How to Make a Small Diamond Look Bigger
This is the practical thread running through most of the seven decisions in our complete guide to designing a custom engagement ring.
First: carat weight isn't size
This is the misunderstanding the whole article rests on. Carat is a unit of weight — one carat is 0.2 grams. It says nothing directly about how wide the stone looks from above.
Two 1.00 carat round diamonds can differ measurably in diameter depending on how they were cut. A deeply cut stone hides weight in its belly, below the girdle, where nobody sees it. A shallower stone spreads that same weight outward, so more of it shows.
And carat scales with volume, not width. Going from 1.00 to 1.50 carats — a 50% price jump and then some — increases the diameter by only about 14%. Which is why buying your way to a visibly bigger stone gets expensive fast, and why design tactics are so much better value.
The tactics, ranked by how much they actually do
1. Choose an elongated shape
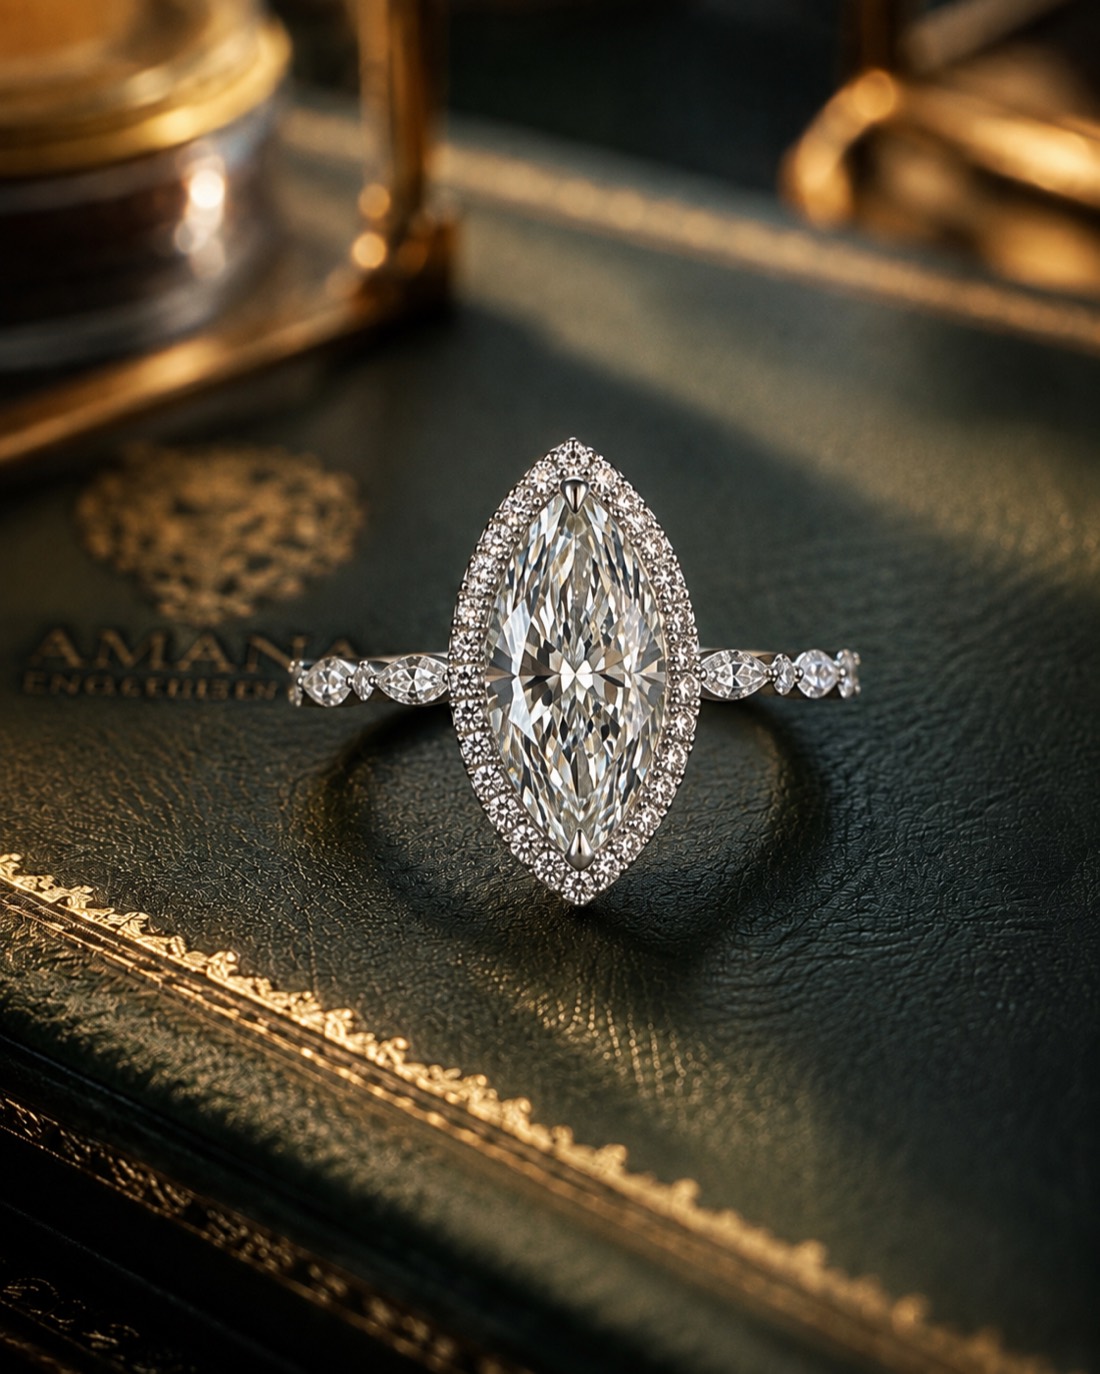
The single biggest lever. Oval, marquise, pear, emerald, and elongated cushion or radiant cuts all cover more surface area per carat than a round, and they run along the finger, which makes them look larger still.
A 1.00 carat round is roughly 6.4mm across. A well-proportioned 1.00 carat oval measures around 7.7 x 5.7mm, and a marquise can hit 10 x 5mm. The marquise has less width but far more length, and on a finger it reads dramatically bigger.
Elongated shapes also make the finger itself look longer and slimmer, which compounds the effect.
Rough ranking by face-up size per carat: marquise, pear, oval, emerald, then radiant and cushion, with round and princess at the bottom. Round diamonds are the least efficient shape for apparent size — and also the most expensive per carat, since more rough is lost cutting them.
2. Buy for spread, not just carat
Within any shape, individual stones vary. Look at two numbers on the certificate.
Depth percentage — how deep the stone is relative to its width. Lower means more spread. For rounds, roughly 59-62.5% is a good target range for a stone that faces up large while still performing well.
The actual measurements — every certificate lists them in millimeters. Compare the millimeter dimensions of stones at the same carat weight and you'll often find a meaningful difference in face-up size for identical money.
One caution: don't chase spread past the point where cut quality suffers. A stone cut too shallow leaks light through the bottom and goes dull or develops a visible dark center. A big flat dull diamond looks worse than a smaller lively one. Stay inside good cut parameters and pick the spreadiest stone within them.
3. Use a thinner band
Pure visual relativity, and it's remarkably effective. A 1.6mm band next to a diamond makes that stone look substantially bigger than a 2.6mm band does, because the eye judges the stone against the nearest reference object.
This is free. It costs less metal, not more.
The limit is durability — very thin bands are more prone to bending and wear over decades, and they're harder to resize repeatedly. Somewhere around 1.6-1.8mm is a reasonable floor for daily wear in a durable metal.
4. Add a halo
The most dramatic single change available. A ring of melee around the center makes the whole cluster read as one bright shape.
A 1.00 carat round at 6.4mm becomes a roughly 8mm visual footprint with a halo — the spread of a stone near 2.00 carats. And melee is cheap per carat, so you buy that jump for a fraction of what the equivalent center-stone upgrade would cost.
The trade: halos soften the outline of distinctively shaped stones, so if she picked an oval or emerald for the shape, this tactic works against the reason she picked it.
5. Lift the setting
Height creates separation. A stone sitting closer to the finger is visually crowded by the finger; a stone lifted away has air and shadow around it and reads as more present.
Cathedral settings and taller heads do this. The trade-off is snagging and bulk, so it's a modest gain with a real daily cost — worth doing in moderation, not to an extreme.
6. Keep the metal white around the stone
A white metal setting blends into the diamond's edge, so the eye reads a slightly larger continuous bright area. A yellow or rose gold setting creates a hard color boundary right at the girdle, which visually stops the stone.
If maximum size is the goal, white prongs and a white head do measurable work — and you can still have a yellow or rose gold band with a white head, which is a common and clever combination.
Worth naming the tension though: warm metals let you drop a diamond color grade and save real money. So this tactic competes with a budget tactic. Choose which you'd rather have.
7. Four claw prongs instead of six
Less metal on the stone means more visible stone. Four prongs cover less of the outline than six, and pointed claw prongs cover less than round or flat tab ones.
Small effect, but free — and it stacks. Just don't run four thin claws on a big stone if she's hard on her hands; security matters more than a couple percent of spread.
8. Buy just under the magic numbers
Diamond prices jump at psychologically round weights — 0.50, 0.70, 0.90, 1.00, 1.50, 2.00 carats. A 0.95 carat stone can cost noticeably less than a 1.00 carat, and the diameter difference is roughly a tenth of a millimeter. Nobody on earth can see that.
Buy at 0.90-0.95 instead of 1.00, or 1.40-1.45 instead of 1.50, and put the savings into a spreadier cut or a halo. This is the purest free money in diamond buying.
9. Keep it clean
Unglamorous and genuinely effective. A film of lotion and skin oil on the bottom of a diamond kills the light return, and a dull stone looks smaller because the eye reads brightness as size.
Warm water, a drop of dish soap, and a soft toothbrush once a week, paying attention to the underside. A clean diamond looks bigger than a dirty one of the same size, and it costs nothing.
What doesn't work
Very shallow "spready" stones outside good cut parameters. They face up big and look dead. Not a trade worth making.
Extremely wide halos on small centers. Past a certain ratio the eye stops reading it as one big stone and starts reading it as a small stone in a busy frame — which draws attention to the small stone.
Thin bands in soft metals. A 1.4mm 18k yellow gold band will bend. The size benefit isn't worth a ring that deforms.
Stacking it — a worked example
Start with a 1.00 carat round in a six-prong setting on a 2.5mm yellow gold band. Face-up spread about 6.4mm.
Now rebuild it at the same or lower budget: a 0.95 carat oval — spready, well within good cut parameters — measuring about 7.6 x 5.5mm, in four white claw prongs, on a 1.7mm band, with a thin halo.
The visual footprint is now roughly 9mm along its long axis, on a finger that looks longer because of the elongation, next to a band that makes it look bigger by contrast. That's not a small change. That's the difference between a ring people register as "a ring" and one they register as "a big ring" — and it likely cost less than the original.
Frequently asked questions
What diamond shape looks biggest per carat?
Marquise gives the most face-up length, followed by pear and oval. Emerald and elongated radiant also spread well. Round and princess are the least efficient shapes for apparent size.
Does a thin band really make a diamond look bigger?
Yes, and it's one of the most effective free tactics. Your eye judges the stone against the nearest reference object, and a slimmer band is a smaller reference.
Is buying just under a carat worth it?
Almost always. A 0.95 carat costs meaningfully less than a 1.00 and is about a tenth of a millimeter narrower — invisible. Redirect the savings to cut quality or a halo.
Can a bezel setting make a diamond look bigger?
Generally no — a bezel covers part of the stone's outline, so it reads a few percent smaller. A wide, thin bezel can create a larger overall bright shape, but if maximum size is the goal, prongs beat bezels.
How much bigger can these tactics actually make a stone look?
Stacked well, a stone can read like something a third to a half carat heavier. The shape choice and the halo do most of the work; the small tactics add up on top.
So where does this leave you?
If you only do three things: pick an elongated shape, buy just under a round carat number and use the savings on spread, and go with a thin band. Those three are cheap or free and they do most of the work. Add a halo if the shape doesn't have an outline worth protecting, and keep the metal white around the stone if size beats the warm-metal color-grade saving for you.
Now here's the thing about all nine of these. Look at what they are: shape, cut proportions, band width, halo, height, metal placement, prong count and style. Every single one is a design decision — and every one of them is made and locked before the ring exists.
You can't thin the band on a finished ring. You can't switch it from six prongs to four without unsetting the stone and rebuilding the head. You can't add a halo without doing the same. You can't retroactively pair your stone with a white head on a yellow band. And the stone-selection tactics — spread, depth percentage, buying at 0.95 instead of 1.00 — only work if you're the one choosing the stone.
A finished ring made all nine calls already, for an average customer, in a factory, before anyone knew who'd buy it. Which is why the only lever left when you're shopping finished rings is the one that costs the most: buy more carats.
That's not retail being shady, to be clear. A manufacturer would need every design in every band width, prong count, halo configuration, and metal combination, across every stone size. Each combination is a separate item that might sit unsold for years. It's genuinely not possible to stock, so it doesn't get made — and the customer ends up paying for size in the one currency that's always available.
Every one of these levers is available when you design it
At Amana we're designers, so all nine of these are just decisions we make with you — and honestly, making a stone look as big as it possibly can is one of the more satisfying parts of the job.
You meet with us in person or over video and we design the concept with you in the room, using AI-assisted visuals so you can see a 0.95 carat oval on a thin band next to a 1.00 carat round on a standard band and pick the one that actually looks better on her hand. About three days later you get a CAD file — a precise 3D model of your exact ring. If you want the band a touch thinner or the ring to sit lower, tell us and we revise. That's normal, it's usually minor, and we keep going until you approve. Then the ring's ready in about two weeks.
Our design and craftsmanship typically runs $1,500 to $4,000, and you get a real, certified diamond ring at the end of it. Larger or rarer stones, or a genuinely complex build, can run higher — and if yours will, we tell you exactly why before you commit to anything.
For context, a comparable ring at a traditional retail jeweler runs about $12,000, and buying that same finished ring wholesale is still around $8,000. We charge for the design and the craftsmanship, because that's the actual work — and it means the budget you were going to spend on extra carats can go into a design that makes the stone look bigger than the extra carats would have.
Amana means "Trust" in Arabic. Earn your trust. Make your ring.